Creating Animations in Aseprite
Who is this for
- Any artist using Aseprite to create animations for a Godot game.
- Any programmer working in Godot who needs to understand how to work with animations created in Aseprite.
Purpose
The purpose of this guide is to help you understand the standards and procedures for creating animations in Aseprite for Godot.
Tools
Why Aseprite Wizard?
- Aseprite Wizard is a plugin for Aseprite that exports animations to Godot.
- It exports animations to a
.tresfile. - It does not require all contributors to have Aseprite installed.
- AnimatedSprite nodes can be configured in Godot with Aseprite settings so that a contributor can reimport edited Aseprite files for faster iteration.
Identify different animations with tags
Why?
By identifying regions with tags, you communicate to the importer in Godot how to handle the animations.
An example showing multiple regions tagged in Aseprite.
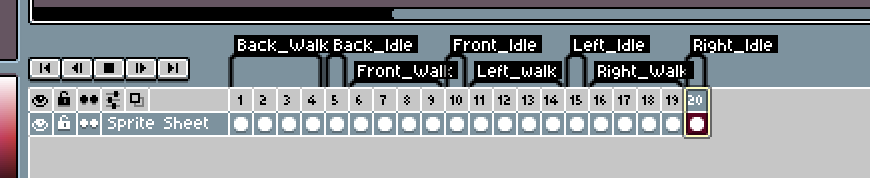
Note: Prefer using the following format for tags:
- all lowercase
- underscores instead of spaces
- animation_direction eg.
idle_front,run_left
Mark animations that do not loop
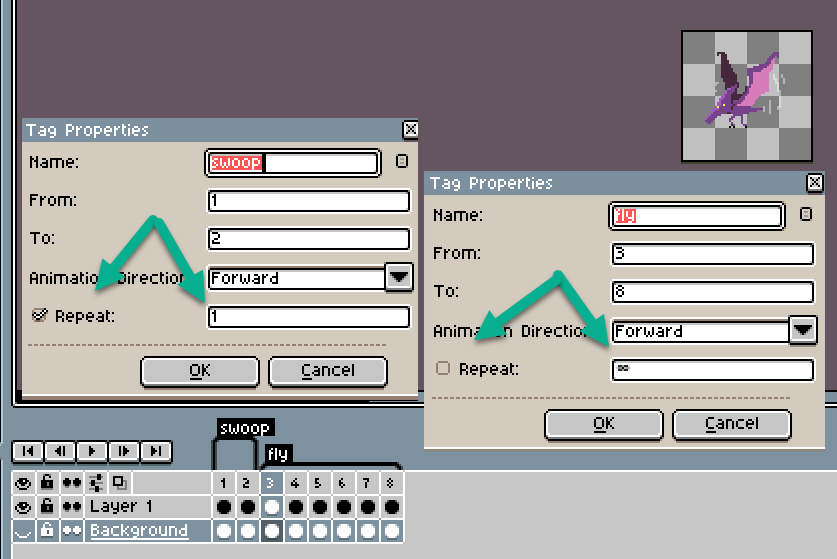
Looping is the default behavior for a region. If you have an animation that does not loop, you can mark it with:
[x] repeat: 1
Example animations that do not loop:
- jump
- death
Exporting animations
When using the Aseprite to Godot Workflow, there is no need to export from the Aseprite file. Instead, you can save the Aseprite file and import it in Godot.